

Moving from a rental where maintenance was handled with a single phone call to owning a home requires a major shift in mindset. Many first-time buyers assume that if a property passes a general home inspection, it is completely move-in ready and will remain trouble-free for years. In reality, a standard real estate inspection is a snapshot of visible conditions on a single day. It is designed to catch immediate major hazards, not to map out the routine, hidden preventative care required to keep a house running smoothly.
Ignoring the quiet, behind-the-scenes upkeep of a home is one of the quickest ways to erode your property value and strain your budget. Small, unnoticed issues—a slow drip behind a vanity, a subtle roof flashing gap, or an uncleaned HVAC condensate line—gradually turn into catastrophic failures. Executing a disciplined, preventative maintenance checklist across your home’s critical hidden systems protects both your daily living comfort and your financial investment.
Electrical, Wiring, and Safety Infrastructure Upgrades

Electrical systems operate behind drywall and inside closed panels, making them easy to ignore until a breaker trips or an outlet stops working. Modern homes support higher electrical loads than ever before, with high-draw kitchen appliances, home theater systems, and heavy HVAC usage running simultaneously. Overlooking routine electrical checks increases the risk of thermal overload, insulation breakdown, and electrical fires.
Testing Arc-Fault and Ground-Fault Interrupters Monthly
Ground-Fault Circuit Interrupters (GFCIs) and Arc-Fault Circuit Interrupters (AFCIs) are critical safety devices built directly into your outlets and circuit breakers. GFCIs prevent severe electrical shocks by detecting current leakage to ground, while AFCIs detect dangerous electrical arcing caused by damaged wiring or loose connections.
Pressing the “Test” button on every GFCI outlet and AFCI breaker once a month ensures the internal trip mechanism operates correctly. If pressing the test button fails to cut power or the reset button will not stay engaged, the device has failed internally and must be replaced immediately to maintain shock and fire protection.
Inspecting Electrical Panel Terminals and Outlets
Your main breaker panel distributes power throughout your entire home. Over time, thermal expansion and contraction caused by fluctuating electrical loads can loosen wire terminal screws inside the panel box, leading to arcing, buzzing sounds, and heat buildup.
Visually inspecting outlet faceplates and switch covers for warmth, discoloration, or faint buzzing provides an early warning of loose wiring connections. If you plan to add major electrical loads, partnering with licensed electrician companies allows you to safely evaluate panel capacity, tighten internal terminal lugs, and upgrade aging service panels before installing heavy-draw equipment.
Servicing Smoke and Carbon Monoxide Systems
Life safety detectors require systematic maintenance rather than simple attention when low-battery chirps begin. Smoke and carbon monoxide detectors have a strict operational lifespan—typically 10 years for smoke sensors and 5 to 7 years for CO sensors.
-
Monthly Sensor Cycling: Depress the primary test button on each detector to verify that interconnected alarms trigger simultaneously across all floors.
-
Annual Battery Replacement: Replace backup batteries in all hardwired and battery-operated units every fall, regardless of battery level readings.
-
Sensor Cleaning: Vacuum dust and cobwebs out of detector sensing chambers every six months to prevent nuisance alarms and ensure swift detection.
Foundation, Grading, and Exterior Boundary Maintenance
A home’s structural integrity relies on maintaining a stable foundation and managing outdoor water flow. Soil expansion, hydrostatic pressure, and uncontrolled surface runoff can crack foundation walls, shift footings, and cause severe basement flooding.
Clearing Foundation Perimeters and Grading Slopes
The soil immediately surrounding your foundation should slope away from exterior walls at a rate of at least six inches over the first ten feet. Over time, soil settles and landscaping beds accumulate mulch, reversing this slope and directing rainwater against the foundation footings.
Maintaining a clear six-inch clearance gap between the top of the soil and the bottom edge of your exterior wall cladding prevents moisture from wicking into wall framing. Clearing foundation perimeters of dense plantings allows airflow to dry out damp soil, lowering the risk of foundation cracking and subterranean moisture intrusion.
Inspecting Outdoor Boundary Structures
Fences and retaining walls shield your lot from soil erosion and mark property boundaries, but they face constant exposure to ground moisture, insect activity, and weather degradation. Wooden fence posts set in concrete footings frequently rot at soil level, while chain-link and iron systems develop rust at structural joints.
Inspecting post bases for movement, checking gate latches for alignment, and monitoring retaining wall drainage holes prevents costly structural collapses. Working alongside a professional fence company allows you to replace decaying posts, reinforce leaning boundary walls, and apply weather-resistant sealants before structural degradation spreads across property lines.
Preventing foundation and perimeter damage requires consistent seasonal checks:
-
Clearing Window Well Drains: Remove accumulated leaves and debris from basement window wells to keep drains clear during heavy downpours.
-
Testing Sump Pump Switches: Pour a bucket of water into the basement sump pit to confirm the float switch activates the pump and discharges water far from the home.
-
Inspecting Retaining Wall Weep Holes: Verify that drainage holes along retaining wall bases remain open and free of clogged dirt or roots.
Roof Overhead, Flashing, and Drainage Systems
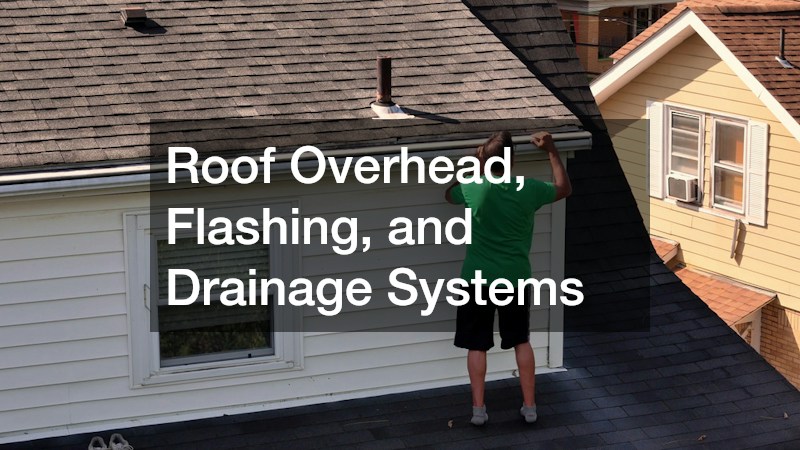
Your roof is your home’s primary defense against rain, snow, wind, and solar heat. Because roof surfaces sit out of sight, minor shingle damage or flashing deterioration often goes unnoticed until water stains appear on top-floor ceilings.
Clearing Debris and Inspecting Roof Valleys
Tree leaves, pine needles, and small twigs accumulate in roof valleys, behind chimneys, and inside gutter channels. This organic debris traps moisture against asphalt shingles, accelerating granule loss and rotting the underlying plywood roof deck.
Inspecting roof valleys twice a year ensures water drains freely into gutters. Removing moss and algae growth with gentle chemical treatments prevents plant roots from lifting shingle edges and breaking the factory adhesive seal during strong windstorms.
Checking Chimney and Vent Pipe Flashing
Roof penetrations—such as plumbing vent stacks, attic exhaust vents, skylights, and chimneys—are the most common source of roof leaks. These areas rely on metal flashing and flexible rubber boot seals to prevent water intrusion. Over time, UV radiation cracks rubber vent boots, while seasonal temperature changes pull metal chimney flashing away from brick mortar joints.
Calling in certified roofing contractors to conduct annual roof inspections ensures that compromised vent boots are replaced and dried caulking is resealed before water reaches interior attic insulation.
Maintain your roof and drainage system with these essential practices:
-
Checking Downspout Discharge Points: Ensure downspout extensions discharge water at least six feet away from foundation walls to prevent basement water pooling.
-
Inspecting Attic Undersides for Stains: Look up at the underside of the roof deck from inside the attic using a flashlight to spot damp wood or rusted nail heads after rain.
-
Clearing Gutter Channels: Clean gutters every fall and spring to prevent ice dams from backing up underneath lower shingle courses.
Plumbing, Drainage, and Wet Area Water Protection
Slow water leaks cause more structural damage over time than sudden pipe bursts. Minor leaks inside wall cavities or underneath subfloors rot timber framing, destroy drywall, and foster toxic mold growth long before visible surface damage appears.
Flushing Water Heater Tanks Annually
Water heaters operate continuously, causing naturally occurring minerals to settle at the bottom of the storage tank. In tank-style water heaters, this sediment forms an insulating layer over the heating element or burner, reducing efficiency and overheating the bottom tank lining.
Attaching a garden hose to the tank drain valve and flushing out accumulated sediment once a year restores heating performance, lowers energy costs, and extends the unit’s operating life.
Inspecting Bathroom Caulking and Grout Lines
Showers, bathtubs, and vanity sinks rely on flexible silicone caulk and cementitious grout to keep water contained within waterproof zones. As houses settle, caulk joints along tub rims and shower pans pull apart, creating narrow gaps where water can enter subflooring.
Inspecting grout lines for hairline cracks and replacing moldy or peeling caulk prevents hidden floor joist rot. Upgrading aging fixtures and valves alongside a skilled kitchen and bath contractor keeps drain traps, supply lines, and shower control valves leak-free behind tiled walls.
Keep your home’s plumbing running smoothly with these routine checks:
-
Exercising Main Water Shutoff Valves: Turn the main house water valve off and on once a year to ensure the valve stem does not seize during a pipe emergency.
-
Inspecting Appliance Supply Hoses: Replace rubber washing machine and refrigerator ice-maker hoses with braided stainless-steel lines every five years.
-
Testing Toilet Fill Valves: Add a few drops of food coloring into the toilet tank; if color bleeds into the bowl without flushing, replace the internal flapper valve.
Structural Building Envelope and Exterior Paint Integrity

The building envelope includes the siding, exterior trim, windows, and doors that enclose your conditioned living space. Maintaining this exterior shell prevents moisture intrusion, seals out drafts, and protects structural framing from rot.
Inspecting Wood Siding for Rot and Pest Damage
Wood siding and exterior trim boards expand and contract with changing weather, breaking caulking seals and opening joints to rainwater. The lowest courses of siding—especially where siding meets decks, porches, or soil—are vulnerable to rot and moisture absorption.
Probing bottom edges of siding trim with a screwdriver reveals soft or spongy wood that requires immediate repair. Partnering with an experienced siding contractor allows you to replace damaged lap siding panels, install proper Z-flashing above windows, and seal open joints before water reaches structural wall studs.
Protecting Exterior Timber with Protective Coatings
Paint and wood stain are structural protective coatings, not just decorative choices. Once paint chips, cracks, or chalks, exposed raw wood quickly absorbs rainwater, swells, and decays.
Hiring a reliable local house painter to power wash, scrape, prime, and recoat exposed exterior wood, fascia boards, and window trim extends wood life by decades. Maintaining continuous paint seals stops moisture from soaking into wood fibers, preventing costly structural repairs later.
Keep your home’s exterior shell sound with these maintenance habits:
-
Inspecting Window and Door Drips: Verify that metal drip edge flashing sits above window and door frames to shed water away from top trim boards.
-
Sealing Exterior Wall Penetrations: Apply exterior-grade silicone caulk around hose bibs, electrical conduit entries, and dryer vents to block air and water leaks.
-
Checking Porch and Deck Post Bases: Ensure wooden porch posts rest on elevated metal post anchors rather than sitting directly on damp concrete.
Windows, Exterior Doors, and Weatherization
Windows and exterior doors provide natural light, ventilation, and access while serving as key components of your home’s thermal insulation barrier. Neglecting seals, tracks, and hardware leads to drafty rooms, higher energy bills, and water leaks.
Testing Window Seals and Thermal Pane Clarity
Modern homes use double- or triple-pane insulated glass units (IGUs) filled with inert gas to insulate interior spaces. Over time, thermal expansion and contraction break the perimeter seal between glass panes, allowing moist air to enter the gap.
Fogging, condensation, or mineral streaks between glass panes indicate a failed window seal. Replacing failed glass units restores energy efficiency and prevents condensation from running down inside wall framing.
Replacing Worn Weatherstripping and Door Sweeps
Weatherstripping along door frames and window sashes compresses and degrades over time, creating gaps that allow conditioned air to escape.
Checking for drafty entryways on windy days or looking for visible light around closed doors pinpoints worn seals. Replacing door sweeps and foam weatherstripping eliminates drafts, lowers winter heating bills, and keeps outdoor dust out.
When window frames show signs of deep rot or drafty operation, working alongside established window companies ensures replacement windows are installed with modern flashing tape, expanding foam, and proper thermal breaks.
Keep windows and doors operating smoothly with these steps:
-
Cleaning Window Track Drain Holes: Clear dirt and dead insects out of lower window track weep holes so rainwater drains to the outside.
-
Lubricating Window Operators and Hinges: Apply silicone spray lubricant to awning window cranks, sliding door rollers, and door hinges annually.
-
Checking Threshold Adjustments: Adjust door threshold screws upward to eliminate gaps under bottom door sweeps without binding the door.
HVAC, Air Quality, and Thermal Comfort Systems
Heating, ventilation, and air conditioning systems maintain comfortable indoor temperatures and manage humidity levels year-round. Because heating and cooling equipment runs out of sight in closets, basements, or attics, regular maintenance is frequently forgotten until the system breaks down on a severe weather day.
Replacing HVAC Filters on Strict Schedules
Return air filters clean the air moving through your HVAC system, removing dust, pollen, and pet dander before air enters the air handler. A dirty, clogged filter restricts airflow across the furnace heat exchanger or AC evaporator coil.
Restricted airflow forces the blower motor to work harder, increasing energy consumption and causing AC evaporator coils to freeze into solid ice. Replacing disposable air filters every 30 to 90 days maintains proper airflow, keeps indoor air clean, and prevents system breakdowns.
Cleaning Condensate Drain Lines and Coils
Central air conditioning systems remove humidity from indoor air, generating gallons of water condensation daily during summer months. This water collects in a drain pan underneath the evaporator coil and flows out through a PVC condensate pipe.
Algae and dirt frequently build up inside the condensate drain line, forming a blockage that overflows the drain pan. This overflow can spill water directly onto ceiling drywall or wood flooring below. Flushing the drain line with vinegar every spring keeps the pipe clear and prevents water damage.
Schedule routine care for your heating and cooling equipment:
-
Clearing Outdoor Condenser Clearance: Trim shrubs and weeds back at least two feet from the outdoor AC unit to ensure adequate heat dissipation.
-
Cleaning Heat Exchanger and Blower Assemblies: Partnering with certified HVAC contractors for bi-annual system tune-ups keeps gas burners, heat exchangers, and electrical relays running safely.
-
Vacuuming Supply and Return Grilles: Keep floor registers and wall grilles free of dust and household furniture to balance airflow across rooms.
Pest Barrier Maintenance and Whole-Home Oversight

Pests like mice, carpenter ants, and termites cause quiet structural damage behind walls, inside floor joists, and throughout attic spaces. Unsealed utility openings and damp foundation wood attract pests, turning small entry points into major infestations.
Sealing Pest Entry Points along Foundations
Mice can squeeze through foundation gaps as small as a dime, while insects enter through minor cracks around utility lines. Inspecting exterior foundation walls for unsealed pipe penetrations, open crawlspace vents, or gaps underneath garage doors reveals easy entry points.
Stuffing utility wall gaps with stainless steel wire mesh and sealing them with exterior expanding foam creates an effective pest barrier that rodents cannot chew through.
Managing Subterranean and Drywood Termite Risks
Termites feed on structural timber, consuming wood from the inside out while leaving outer surfaces intact. Subterranean termites build mud shelter tubes up foundation walls to reach wood framing without drying out.
Keeping firewood piles off the ground and stacked away from exterior walls reduces termite risk. Contracting an accredited pest control service to inspect your home annually, install soil bait barriers, and treat exposed framing prevents costly structural timber damage.
When pest remediation or structural repairs overlap with larger home renovations, coordinating with licensed general contractors keeps your property’s framing, insulation, and finish work aligned.
Protect your home against pest damage with these habits:
-
Trimming Canopy Branches Back: Cut tree branches back at least six feet from rooflines to prevent squirrels, raccoons, and ants from accessing your roof.
-
Eliminating Wood-to-Soil Contact: Ensure wooden fence posts, deck steps, and trellis frames do not touch ground soil directly without concrete isolation.
-
Monitoring Crawlspaces for Mud Tubes: Check crawlspace walls and stem footings with a flashlight twice a year for pencil-thin termite mud tubes.
Building Your Long-Term Home Preservation Plan
Maintaining a home requires moving from reactive repairs to a structured, preventative schedule. Staying ahead of minor electrical, plumbing, roof, and structural maintenance items protects your wallet from sudden, expensive emergency calls.
Creating a simple seasonal checklist divides maintenance tasks into manageable spring, summer, fall, and winter routines. Taking a systematic, proactive approach to home maintenance ensures your home remains safe, comfortable, and valuable for years to come.